You can update the configuration of your VKX security camera when a VOSKER advisor recommends it.
Required Tools
- The VKX camera
- A fully-charged V-LIT-B3 battery pack
- A MicroSD card reader
- A computer
- An internet connection
- A Philips screwdriver
Configuration Update Step-By-Step
- Turn off the VKX.
- Remove the small panel next to the hinge with the Philips screwdriver.
- Press the VOSKER black MicroSD card delicately from the slot under the hinge to release it.
Warning: do not touch the two SIM cards above the hinge. - Insert the MicroSD card into the card reader you connected to your computer. Two USB drives will appear in the computer’s File Explorer.

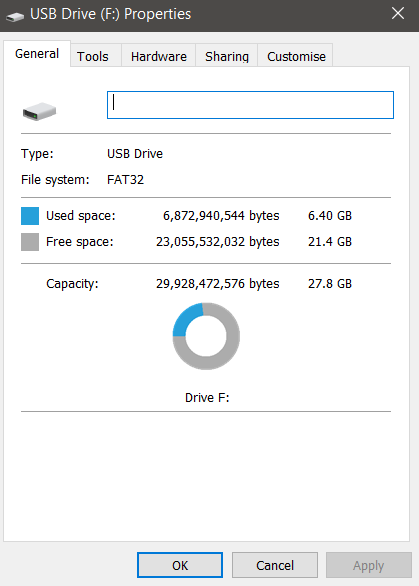
- Identify the bigger drive by right-clicking on one of the two drives and choose “Properties” to check its size. The big drive should be around 28Gb.
- Download this file: VKX_CONFIG.zip.
- Unzip the file.
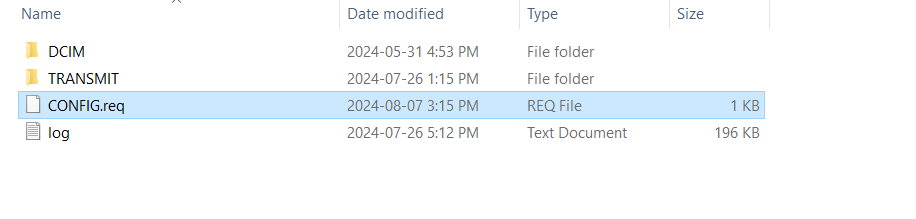
- Drag and drop the file “CONFIG.req” onto the bigger drive.
- Eject both drives by right-clicking on them.
- Take the MicroSD card from the card reader and insert it into the VKX again. Delicately push until it clicks.
- Turn on the VKX and leave the door open.
- When the lights are off, press the TEST button. The status light will turn blue, and you should soon see a new photo in your VOSKER app.
If you have trouble with one of these steps, chat with one of our experts 24/7.